After the reverse painted glass object had been dismounted, assessed, and cleaned it could be bonded. Selecting an adhesive had to be done carefully and much testing ensued. While it is typical to use an epoxy resin to bond modern glass objects, there was a selection to choose from; Hxtal NYL-1, Fynebond, or Araldite 2020. Each of these has slightly different properties: Hxtal has a Refractive Index (RI) very close to that of modern glass and a long cure time (approximately seven days). Fynebond also closely matches the RI of modern glass, has a shorter cure time (approximately two days), and can be brittle though it is strong. Araldite 2020 has a short cure time (approximately two days), and is less brittle than Fynebond, however, it tends to yellow more over time than the other two epoxies. While each of these resins have different properties, they are all the same in one way: they all travel and spread into every nook and cranny in their liquid form. For an object like this painted glass, that can be very dangerous. If left to their own devises, these adhesives could have spread into the paint layer and stain it, creating a dark (and ugly) shadow around the bond line.
Unfortunately, the best way to ensure a strong and well-aligned join is to bond through “capillary action”, which is a process that requires the glass pieces to be aligned and tightly secured in place (usually with tapes) before the adhesive goes on. The liquid resin is then added to the break lines, where it travels into the break and cures, thereby bonding the object. For this reverse painted glass, the adhesive needed to travel just far enough to bond the shards, but not so far that it affected the paint.
Three of the considerations during the selection of the adhesive where: 1) it could not negatively affect the photographs (the geishas) or paint layer, 2) it should be strong and flexible enough to support the large sections of fractured glass in changing environments, and 3) it could not adversely react with the adhesive already present on the object. In an effort to select the appropriate adhesive, multiple tests were undertaken. The first of these tests was to apply a small dot of Hxtal to the excess adhesive originally left on the object and another to a discrete area of the paint. These tests ensured that a new adhesive would not react badly with the previous repair, nor would it negatively affect the paint layer.
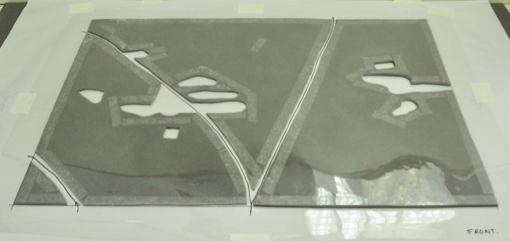
To establish how the photo paper might react to the introduction of an adhesive, a small model reproduction of the object was created and fractured in the same places the original was. This model contained photographs and was painted with acrylic paint. When it was bonded (using a different epoxy on each break-line to test each of the available adhesives), it was found that the photo paper was indeed susceptible to damage (darkening) from the epoxy resin. The bonding process, however, had no effect on the paint layer.

The model reproduction of the object is shown above.
This series of tests revealed that use of Hxtal epoxy as the adhesive would likely endanger the photographs because of its long cure time (longer cure gives the resin more time to travel). The Fynebond would not pose this risk, however, because the object is so large and could potentially flex depending on its environment, Fynebond’s tendency to be brittle was not desirable. So, it was decided that Araldite 2020 would be used to bond. To further mitigate any risk of damage to the photo paper, gelled Araldite (which is not likely to travel because of its consistency) would be used to bond that area.
A Melinex (polyethylene sheeting) and Plastazote (polyethylene foam) template was created to support the object during bonding. The shards were aligned on the template and supporting tapes were applied to the shards to keep them in alignment during bonding. Gelled Araldite was applied to the section of the break that surrounded the photograph previous to it being taped. The remainder of the liquid epoxy then was introduced to the break-edges on the front side of the object (i.e. not the painted side). The resin was left to cure over the course of two days before the tapes and any excess epoxy was removed.


The template and the section with the photograph bonded with gelled Araldite as well as the whole object during bonding. Weights (the canisters) were placed on the object to keep the break-edges in alignment.
At this stage, the detached pieces of mother-of pearl were cleaned and reapplied to the object with a small amount of Paraloid B72 (ethyl methacrylate copolymer) adhesive.
Once the object was back in one piece, the process of retouching began to replace the areas of paint loss and further disguise the break-lines. Retouching was done on a sheet of Melinex cut to fit the entire object. Acrylic paints were applied to the sheet to give it color in the appropriate areas. The retouching was applied to the reverse side of the Melinex so that there will be no interface between the two paint layers.

The reverse of the object with the retouched Melinex sheet backing.
With all the shards back in place and the retouching done, it was time to put the whole object back together. It was decided to remount the object with new materials instead of replacing the original materials to preserve the long-term stability of the object. The original backing board was not acid-free and had already somewhat degraded and the corroded nails were part of what caused the original damage to the object. For these reasons, new materials and a new mounting system was implemented. The glass was reinstalled in the correct position in the frame, followed by the Melinex retouched sheet (with the paint facing outward, not touching the glass). After these layers had been put in place, a sheet of acid-free card was installed, followed by a sheet of acid-free mounting board. These were secured in place with galvanized steel custom cut mounting wedges which were gently anchored into the frame (using the original holes from the nails as pilot holes) to secure the object and backings in place.


The new backing secured with galvanized steel wedges and a close-up of one wedge.
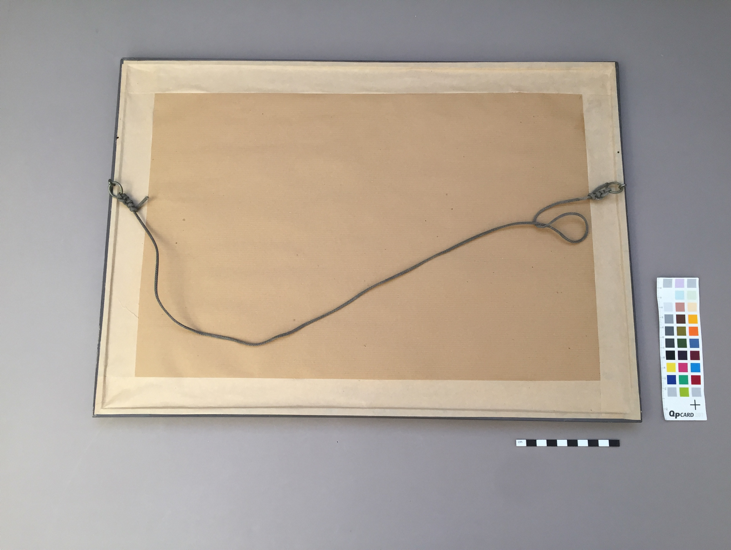
Once these layers had been mounted, the back of the object was finished by applying a layer of parcel paper secured with self-adhesive gum tape. This final layer will protect the object from the ingress of dust, pests, and debris in the future. Once this backing was in place, the original hanging apparatus was reattached. This completed treatment on the object and it went back to its owner to hopefully have a long and happy life!

The final backing layer of parcel paper and gum tape.